Renovation debris removal in Mitcham: practical solutions
Renovation work has a habit of looking calm and manageable right up until the first pile of rubble, broken plasterboard, ripped-up flooring, and dusty timber lands in the hallway. Then reality arrives. If you are dealing with renovation debris removal in Mitcham: practical solutions are less about brute force and more about planning, safe handling, and getting waste off-site without turning your home, flat, shop, or rental into a mess that lingers for days.
This guide breaks the job down in plain English. You will learn what counts as renovation debris, how the removal process usually works, when it makes sense to handle things yourself, and where professional help can save time, effort, and a few grey hairs. We will also look at practical checks for safety, compliance, and recycling, because let's face it, nobody wants a lovely new kitchen surrounded by broken tiles and dust sheets for longer than necessary.
Table of Contents
- Why renovation debris removal matters
- How the debris removal process works
- Key benefits and practical advantages
- Who this is for and when it makes sense
- Step-by-step guidance
- Expert tips for better results
- Common mistakes to avoid
- Tools, resources and recommendations
- Law, compliance, standards, or best practice
- Options, methods, or comparison table
- Case study or real-world example
- Practical checklist
- Conclusion
- Frequently asked questions
Why Renovation debris removal in Mitcham: practical solutions Matters
Renovation debris is not just "rubbish". It is a mix of materials with different weights, risks, and disposal needs. Broken brick, rubble, plasterboard, old units, skirting, packaging, nails, glass, insulation offcuts, and dusty bagged waste all behave differently once they are out of the room. Some are awkward. Some are sharp. Some are surprisingly heavy. And a few bits seem determined to trip you the moment you turn your back.
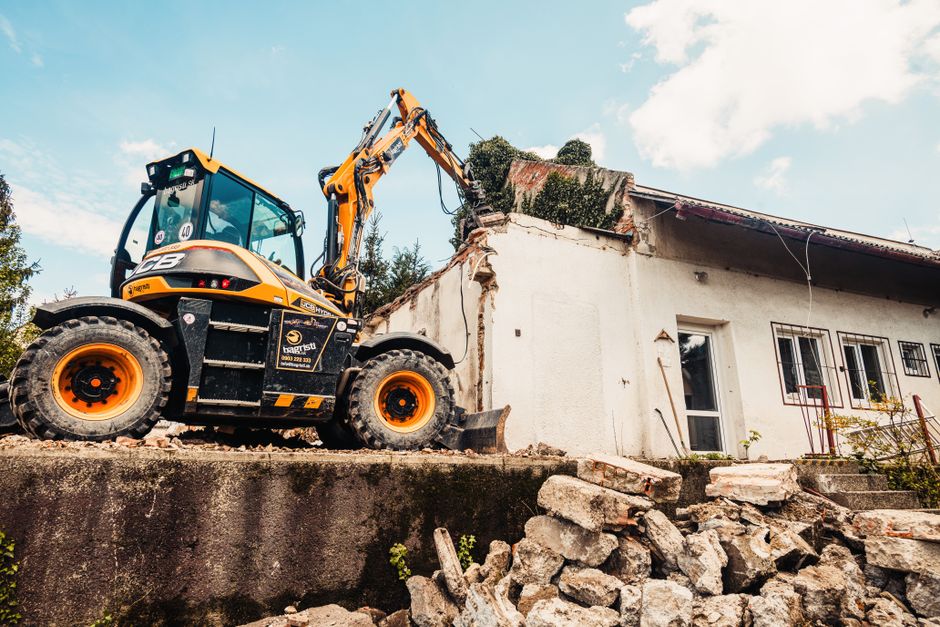
In Mitcham, where homes and business premises range from compact flats to older properties and active commercial spaces, debris removal needs to be organised around access, stairways, parking, and neighbour-friendly timing. A skip can work well in some situations, but not every property has the space or permissions. And if the waste is scattered across multiple rooms, a clean and efficient clearance plan becomes even more valuable.
Good debris removal matters because it keeps the project moving. Builders can work faster when pathways are clear. Residents can stay safer. Dust and clutter are reduced. You also avoid the awkward final-stage panic where a renovation looks finished apart from the mountain of waste sitting outside. It is one of those jobs that seems secondary until it suddenly becomes the whole story.
Practical takeaway: renovation debris removal works best when you treat it as part of the build plan, not as an afterthought once the decorating is done.
If you want to understand the wider clearance picture around a property, services such as builders waste clearance and general waste removal are often the most relevant starting points for mixed renovation waste.
How Renovation debris removal in Mitcham: practical solutions Works
The process is usually straightforward, but it works best when each stage is handled in the right order. The aim is to separate, move, load, and dispose of debris with minimal disruption. That sounds simple. In practice, the small details matter quite a lot.
1. Assess the debris
Start by identifying what type of waste you have. A bathroom refit produces different debris from a loft conversion or a single-room refresh. You may have timber, metal, ceramics, old fixtures, packaging, and bagged dust. If you are unsure what is recyclable, what needs separate handling, and what is just bulky mixed waste, sort it before the removal day if you can.
2. Clear access routes
Pathways to the waste stack should be as clear as possible. That means hallways, doorways, stairwells, and garden exits too. A smooth route saves time and reduces the chance of damage. If you are removing debris from an upper floor flat, think carefully about how the bags or rubble will come down. Nobody enjoys a chipped banister or a broken tile in the boot room.
3. Use the right containers
Heavy rubble needs sturdy bags or containers. Sharp offcuts should be boxed or bundled safely. Loose plasterboard and fragments should not be left scattered, because dust spreads quickly and creates extra cleanup later. For larger volumes, a professional team may load the material directly into a vehicle, which is often easier than trying to stage everything yourself.
4. Separate reusable and recyclable items
Not all renovation debris is destined for the same route. Some materials can be diverted for recycling or reuse depending on condition and local processing options. That helps reduce landfill pressure and can make the process more responsible overall. For readers who want a broader sustainability approach, the site's recycling and sustainability page is a useful related resource.
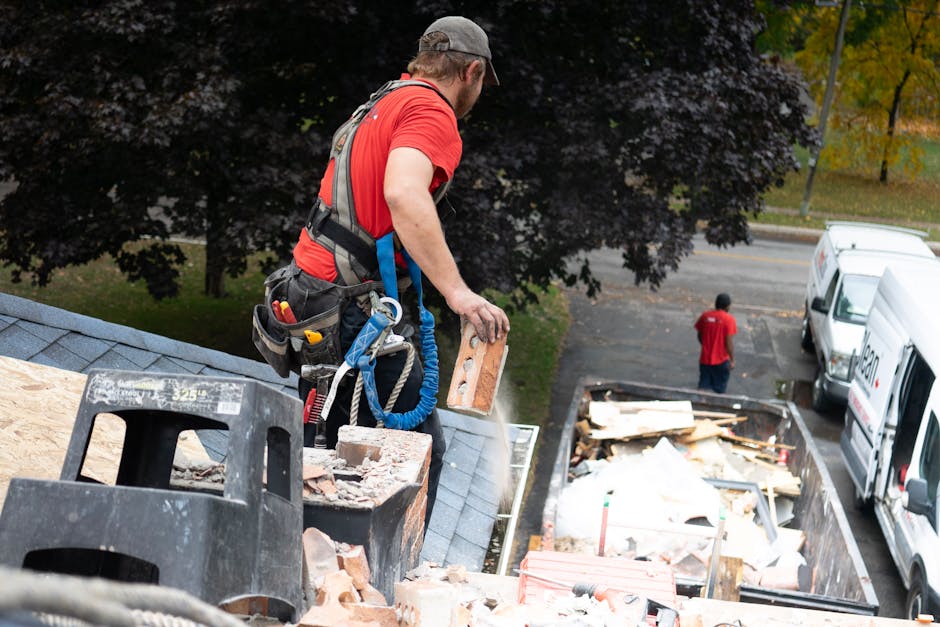
5. Remove, transport, and dispose properly
Once loaded, the waste should be taken to an appropriate facility or transfer route. For domestic and trade jobs alike, the key is legal, traceable disposal. A tidy site at the end is nice, yes, but proper disposal is the part that really protects you.
Key Benefits and Practical Advantages
There are obvious benefits to getting renovation debris out quickly, but the less obvious ones matter just as much. A clean site changes the pace and mood of the entire project.
- Faster project progress: contractors can move around safely and work without constant obstruction.
- Better safety: fewer sharp edges, loose boards, and hidden hazards underfoot.
- Less stress: the job feels manageable when waste is under control.
- Cleaner finishes: dust and fragments do less damage to fresh surfaces and newly fitted items.
- More flexible access: useful in flats, terraces, and properties with tight entrances.
- Improved recycling potential: separating materials early can support better waste handling.
- Lower risk of complaints: neighbours are less likely to object if waste is removed promptly and neatly.
There is also a practical financial angle. If waste piles up, tradespeople often lose time stepping around it, moving it repeatedly, or stopping work to clear routes. That can quietly eat into your budget. So yes, debris removal is a housekeeping task, but it is also a project efficiency tool.
For larger jobs, especially those involving mixed materials from internal strip-outs, builders waste clearance is usually the closest fit. If furniture, old wardrobes, or damaged fittings are part of the mix, furniture disposal may also be relevant.
Who This Is For and When It Makes Sense
Renovation debris removal is not only for large contractors. In fact, many of the people who need it most are ordinary homeowners in the middle of a kitchen refresh, flat refurbishment, or one-room upgrade that has turned unexpectedly busy. Sound familiar?
This approach makes sense for:
- Homeowners replacing kitchens, bathrooms, flooring, or internal finishes.
- Landlords preparing a property between tenancies after refurb work.
- Property managers coordinating turnarounds in blocks and rental homes.
- Builders and tradespeople who need waste cleared quickly so work can continue.
- Small businesses refurbishing a shop, salon, studio, or office area.
- Flat residents dealing with limited storage and awkward stair access.
It is especially sensible when debris is bulky, mixed, dusty, or too much for standard council collection. It is also the better choice when the job is time-sensitive. If you are due to hand a property back, open a room for decorators, or simply stop living with bags of rubble in the corner, a proper clearance is often the cleanest route.
Sometimes the job overlaps with other clearance needs. A renovation in a house may reveal loft clutter, old furniture, or garage items that are now in the way. In that case, services like house clearance, loft clearance, or garage clearance can help deal with the wider project fallout.
Step-by-Step Guidance
If you want a practical route through the mess, use this sequence. It keeps the job organised and prevents that horrible "where do we start?" feeling.
- Walk the site first. Identify where waste is stored, whether the access path is clear, and if there are fragile surfaces that need protection.
- Separate waste types. Put rubble, timber, metal, packaging, and reusable items into different stacks where possible.
- Remove hazards early. Nails, broken glass, protruding screws, and loose strips should be dealt with before heavier lifting begins.
- Estimate volume. This helps you decide whether a van load, multiple collections, or a more substantial clearance is needed.
- Check access and parking. In Mitcham, as in much of London, access can be the part that slows everything down. Plan for it rather than hoping it resolves itself.
- Book the right type of removal. Mixed renovation waste usually needs a service that can handle bulky and heavy material together.
- Clear in stages if needed. For larger refurbishments, remove waste room by room instead of waiting until the end.
- Finish with a sweep-through. Dust, screws, tape, and fragments love to hide in corners. Always do a final check.
A simple example: if a bathroom is being stripped out in a second-floor flat, remove broken sanitaryware and tiles as they are produced, rather than stacking everything in the hallway for a week. The site stays safer, the neighbours are less annoyed, and the room becomes usable for the next trade much sooner. Small thing? Not really.
Expert Tips for Better Results
Here is where experience saves time. The actual removal is only half the story; preparation is what makes it smooth.
- Bag light debris before the heavy stuff arrives. If plaster dust and small fragments are already contained, the load is easier to manage.
- Keep wet and dry waste apart where possible. Damp debris becomes heavier fast, and nobody needs that surprise.
- Protect floors and corners. Old blankets, board sheets, or proper covers can reduce scuffs on narrow routes.
- Don't overfill bags. Overloaded bags split at the worst moment, usually after you have already taken three flights of stairs. Annoying, to put it mildly.
- Use a sensible staging area. A garage, driveway, or one protected corner can work as a temporary collection point.
- Plan for dust. Renovation dust gets everywhere, including the places you will swear it could not reach.
- Ask about recycling routes. Responsible removal should not just mean "it disappeared". It should mean "it was handled properly".
If your project includes old office furniture, display units, or workstations after a refit, the related office clearance service can be useful alongside debris removal. For general bulky items that need to go at the same time, furniture clearance may be the easier fit.
Common Mistakes to Avoid
Most clearance headaches come from a few repeat mistakes. Avoid these and you will save yourself time, money, and a fair bit of hassle.
- Leaving waste until the end. The pile grows, access worsens, and the final clear-up feels bigger than the renovation itself.
- Mixing every material together without thought. Some waste can be diverted more responsibly if it is not thrown into one giant heap.
- Underestimating weight. Bricks, tiles, plaster, and soil-based debris are much heavier than they look.
- Ignoring access restrictions. Tight roads, parking limitations, and shared entrances can derail the smoothest-looking plan.
- Using weak sacks or containers. Split bags create delays and more mess.
- Forgetting about sharp edges. One cut glove or damaged wall is enough to remind you why care matters.
- Assuming all waste can be handled the same way. It cannot. Different materials need different handling and disposal routes.
The other mistake is emotional, oddly enough: trying to do too much yourself in one day because it feels cheaper. Sometimes it is. Sometimes it is not. If the waste is awkward, heavy, or spread across more than one level, bringing in help can actually be the sensible option.
Tools, Resources and Recommendations
You do not need a warehouse of equipment to manage renovation debris well, but the right tools make a big difference. The aim is not fancy. The aim is safe and efficient.
| Item | Best use | Why it helps |
|---|---|---|
| Heavy-duty rubble sacks | Tiles, plaster, brick fragments | Contain dust and prevent splits |
| Work gloves | General handling | Protect against sharp edges and debris |
| Dust masks | Dusty strip-out tasks | Helps reduce inhalation of fine dust |
| Protective coverings | Floors, corners, doorframes | Reduces scuffs and accidental damage |
| Wheelbarrow or trolley | Moving heavier loads | Spreads weight and saves lifting strain |
| Strong tape and boxes | Loose offcuts, fittings, sharp scrap | Keeps smaller items together safely |
For practical recommendations, think in terms of route, weight, and timing. If waste is mostly dry and lightweight, bagging may be enough. If it includes rubble, broken fixtures, and bulky sections of the old fit-out, a more direct removal service is usually better. If you are unsure, the useful question is not "Can I move it?" but "Can I move it safely, repeatedly, and without damaging the place?" That question has saved more than one staircase.
There are also support pages that can help when you are planning payment, safety, or how a job is handled. Depending on what you need, pricing and quotes, insurance and safety, and payment and security are worth a look before booking anything.
Law, Compliance, Standards, or Best Practice
Waste removal should be approached carefully. In the UK, anyone producing waste has a responsibility to make sure it is handled properly. That does not mean you need to become a compliance expert overnight, but it does mean being thoughtful about who removes the waste, where it goes, and how it is documented where applicable.
For renovation debris, the main best-practice principles are fairly simple:
- Use a reputable waste carrier or clearance provider.
- Do not leave waste in public areas without proper permission or arrangements.
- Keep materials separate where practical.
- Handle potentially hazardous items with extra care.
- Make sure disposal is legal and traceable.
If your renovation involves potentially hazardous materials, care is needed. This article does not make assumptions about asbestos, electrical waste, or specialist materials; if anything like that is present, it should be treated separately and handled by the appropriate qualified professionals. Better cautious than sorry. Definitely better.
Good compliance is not just about avoiding trouble. It is about keeping people safe, protecting shared spaces, and reducing the chance that waste ends up dumped somewhere it should not be. That is common sense, really, but it is worth saying plainly.
Options, Methods, or Comparison Table
There is more than one way to deal with renovation waste. The right option depends on scale, access, timing, and the type of debris involved.
| Method | Best for | Pros | Limitations |
|---|---|---|---|
| DIY bagging and council-style disposal | Very small amounts of light waste | Low cost, simple for tiny jobs | Time-consuming, limited capacity, physically demanding |
| Skip hire | Larger steady volumes, accessible properties | Good capacity, useful for ongoing work | Needs space and may be awkward in tight Mitcham streets or flats |
| Man and van clearance | Mixed debris, bulky items, fast turnaround | Flexible, quick, less lifting for the customer | Needs clear loading access and good waste separation |
| Specialist builders waste clearance | Heavy renovation debris and strip-out waste | Well suited to rubble, timber, and mixed materials | May be overkill for a very small tidy-up |
For many renovation jobs, the most practical route is not one method alone but a blend. For example, small recyclable packaging may be sorted out, while the bulkier rubble is cleared in one visit. A good provider will usually help you decide what makes the most sense rather than forcing a one-size-fits-all approach.
If your renovation is part of a wider property refresh, you may also need related services such as home clearance or flat clearance to deal with furniture and stored items that get in the way of works.
Case Study or Real-World Example
Imagine a typical Mitcham kitchen refurbishment in a ground-floor maisonette. The old units come out first, then tiles, then plasterboard offcuts, packaging, and a few obsolete appliances. At first the homeowner thinks a few extra bin bags will do the trick. By day two, the back room is full, the hallway is narrow, and the trades are stepping around everything. You can feel the whole job slowing down.
The practical fix is to sort what can be moved safely, protect the path to the front, and clear the bulk waste before the final installation phase begins. Heavy rubble goes together. Timber and units go together. Smaller loose items are bagged. The result is simple but noticeable: the room stays workable, the decorators have space to finish properly, and the final clean-up is much easier.
That kind of example shows the real value of planning. Not dramatic. Just smoother. And smoother is what people usually want once the noise and dust start.
Practical Checklist
Use this before the clearance starts, or even the day before. It is a small checklist, but it covers the things people most often forget.
- Have I identified the main waste types?
- Are there sharp, heavy, or dusty materials that need special care?
- Is the access route clear from the work area to the exit?
- Have floors, walls, and corners been protected where needed?
- Are bags and containers strong enough for the load?
- Do I know whether items can be reused or recycled?
- Is parking or loading access sorted for collection?
- Have I separated furniture or bulky items from pure construction debris?
- Do I need a one-off clearance or a staged removal plan?
- Have I checked the disposal provider's safety and insurance details?
If the answer to several of those is no, take a step back and re-plan. That is not failure. That is experience arriving a bit early.
Conclusion
Renovation debris removal in Mitcham: practical solutions are really about making the messy middle of a project manageable. Once you have a clear plan, the waste stops feeling like a wall of stress and starts feeling like a job with a beginning, middle, and end. Sort the materials, protect the access, choose the right removal method, and keep safety in view throughout.
For small jobs, a careful DIY approach may be enough. For heavier, mixed, or time-sensitive work, a professional clearance option is usually the cleaner and less exhausting route. Either way, the goal is the same: keep the renovation moving, keep the property safe, and finish with a space that feels ready for the next stage rather than held hostage by rubble.
Get a free quote today and see how much you can save.
And once the dust settles, there is something genuinely satisfying about looking at a clear room and knowing the hard part is behind you. That calm, empty space? It earns its own kind of smile.
Frequently Asked Questions
What counts as renovation debris?
Renovation debris usually includes broken tiles, plaster, timber offcuts, old fixtures, packaging, rubble, dust, and other waste produced during a refurbishment or strip-out.
Can I put renovation waste in my normal bins?
Usually no. Most renovation waste is too bulky, too heavy, or not suitable for standard household bins. It often needs a dedicated clearance or waste removal solution.
Is renovation debris removal suitable for flats in Mitcham?
Yes, but access matters. Flats often need careful planning because of stairways, shared entrances, parking limits, and noise considerations. A flexible clearance method is often best.
What is the safest way to move heavy rubble?
Use small loads, strong containers, and safe lifting technique. If the waste is heavy or awkward, it is usually better to have it removed directly rather than carrying it repeatedly.
Do I need to sort waste before it is collected?
It helps a lot. Sorting can make recycling easier, speed up collection, and reduce handling risks. Even a basic split between rubble, timber, and bulky items is useful.
How do I know whether I need builders waste clearance or general waste removal?
If the debris mainly comes from construction or renovation work, builders waste clearance is usually the better fit. If the load is more mixed or includes household clutter as well, general waste removal may be more suitable.
Can old furniture be removed with renovation debris?
Yes, if the service supports bulky item removal. In many projects, damaged furniture, wardrobes, and old fittings are cleared alongside the debris so the site is fully reset.
What should I do about dusty materials like plaster?
Contain them in strong bags, avoid overfilling, and keep them separate from reusable items where possible. Dust control is worth the extra minute or two.
How long does debris removal take?
It depends on the amount, the access, and how well the waste has been prepared. A small load may be quick, while a full strip-out can take more planning and more than one round.
Is recycling possible with renovation waste?
Often yes, at least for some of the material. Timber, metal, and certain clean construction waste streams may be recyclable depending on condition and handling. Mixed waste is harder, so separation helps.
Do I need to worry about compliance when hiring a clearance service?
Yes, in a practical sense. It is wise to use a service that handles waste responsibly, follows legal disposal routes, and can explain how materials are managed. That is a basic trust check, not a complicated one.
What is the best option if I want the job done quickly?
If time is tight, a direct clearance service is often the quickest route because it reduces the need for multiple handling steps. It is especially helpful when the renovation deadline is looming and the dust is starting to win.
Can renovation debris removal be combined with other clearances?
Yes. It is common to combine it with furniture, loft, garage, or house clearance when a project exposes extra clutter or old items that need to go as well.
Where can I learn more about the company and its service standards?
Useful places to start are the about us page, the insurance and safety information, and the complaints procedure if you want reassurance about how issues are handled.